Scheduling a septic tank inspection can feel like a daunting task, especially if you’re unsure what to expect or how to prepare. Whether you’re a new homeowner, planning to sell your property, or simply maintaining your system, understanding the key elements of a septic inspection will help you get the most accurate results and potentially save money on unnecessary repairs or emergency services. This guide covers the essential knowledge you need before the inspector arrives at your property.
Gather Your As-Built Drawings and System Records
One of the most valuable documents you can have ready is your as-built drawings or record drawing from your local health department. This map shows the exact location of the tank, lids, and drain field, saving the inspector time and preventing unnecessary digging. Instead of spending hours probing your yard or using ground-penetrating radar equipment, a clear drawing allows the inspector to go straight to the inspection points.
If you don’t have these drawings, contact your local health department or county environmental office immediately. Many jurisdictions keep detailed records of septic systems installed within their boundaries. Having this information on hand demonstrates that you take your system seriously and helps the inspection process move smoothly. Even if the drawings are slightly outdated, they provide a helpful reference point. Without them, the inspector may need to charge additional fees for locating equipment, which adds to your overall inspection cost.
Implement a Water Usage Moratorium Before Inspection Day
A critical but often overlooked step is to implement a water usage moratorium for 12 to 24 hours before the inspection. This means avoiding the dishwasher, laundry, and sprinklers during this period. A rested system allows the inspector to accurately measure the normal liquid level and test the soil’s absorption without hydraulic overload.
When water continuously flows into the tank, the system stays in a state of activity that doesn’t represent its baseline condition. The inspector needs to see how the tank and drain field perform under typical circumstances, not during peak usage. By giving your system time to settle, you allow solids to naturally separate and allow the liquid level to stabilize. This resting period provides a much clearer picture of your system’s health and functionality. If an inspector arrives during heavy water usage, they may recommend a repeat inspection, delaying your results and adding expense.
Clear Away Obstacles Around Tank Lids and Risers
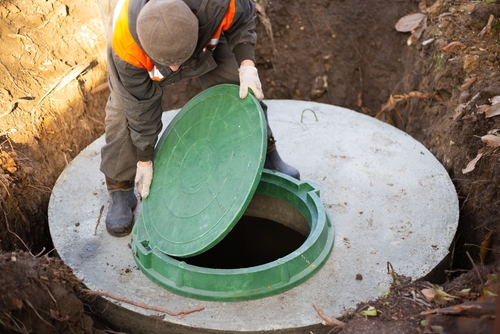
Before the inspector arrives, take time to clear away mulch, heavy pots, or overgrowth from the tank lids. If your lids are buried, digging them up ahead of time or marking them clearly can reduce labor costs or prevent the inspector from having to reschedule. Riser and lid access is fundamental to the inspection process, as the inspector needs direct visual and physical access to examine the tank’s interior.
Many homeowners unknowingly cover their tank lids with landscaping materials, which makes the inspector’s job harder and increases the time needed to complete the inspection. Some inspectors charge hourly fees, so unnecessary digging directly impacts your bill. Additionally, if the lids are too difficult to access during the scheduled inspection, the professional may not be able to complete the work and will need to reschedule. This delay can be problematic if you’re under a time constraint, such as when preparing for a home sale or addressing a system failure.
Understand Scum and Sludge Benchmarks and Baffle Integrity
During the inspection, the professional will evaluate the condition of solids accumulation in your tank. Understanding the 1/3 rule is important: if the combined scum and sludge layers occupy more than one-third of the tank’s working volume, the inspector will likely recommend an immediate pump-out. Scum is the layer of grease and oils that float on the surface, while sludge is the heavier material that settles at the bottom.
The inspector will also examine baffle integrity, which refers to the internal pipes that prevent solids from flowing into the drain field. The inspector will check if the inlet and outlet baffles are intact, as a missing or broken baffle is a leading cause of total system failure. When baffles deteriorate or break, solid waste can travel directly into your drain field, clogging it and rendering your entire system inoperable. This situation is expensive to repair and may require drain field replacement. Knowing about these components in advance helps you ask informed questions and understand the inspector’s findings.
Prepare for Hydraulic Load Testing and Drain Field Assessment
Be prepared for the inspector to run water in the house for a set period. This test simulates peak usage to see if the tank and drain field can handle a high volume of effluent without backing up. The hydraulic load test is one of the most revealing aspects of an inspection because it shows how your system performs under stress. You might not witness any problems during normal use, but peak usage can expose weaknesses that need attention.
Before the inspector arrives, walk your yard and note any spongy soil, odors, or unusually green grass. These are red flags for surfacing sewage that you should point out immediately. Surfacing sewage indicates that your drain field is failing and cannot absorb effluent properly. This is a serious condition that requires professional intervention. If you’ve noticed wet spots in your yard, especially during dry seasons, document these areas and share the information with your inspector. This proactive approach demonstrates your awareness and helps the inspector prioritize their investigation.
Maintain and Organize Your System Records
Having your pumping receipts and repair history ready is invaluable. Knowing the date of the last service helps the inspector determine if your system is accumulating solids at a normal or accelerated rate. A maintenance log readiness shows the frequency of pumping, any repairs performed, and the names of companies that serviced your system.
If your system has required more frequent pumping than normal, this suggests potential issues with usage habits or system design. If you’ve invested in repairs, sharing this history helps the inspector understand what’s been done and what still needs attention. Many homeowners don’t keep these records, forcing the inspector to make assessments without a clear picture of the system’s history. Your organized documentation streamlines the inspection process and ensures nothing is overlooked.
Conclusion
Preparing for a septic tank inspection involves gathering documentation, implementing temporary usage restrictions, clearing physical obstacles, and understanding the key components the inspector will evaluate. By taking these steps before your appointment, you ensure a more thorough inspection, potentially save money on additional fees, and gain valuable insights into your system’s condition and longevity.
Need Plumbing Services in Modesto, CA?
Welcome to Alvarado Pumping Septic Service, your family owned and operated septic system service company. Serving Stanislaus County and the surrounding areas for over 10 years, we offer the most competitively priced services from septic tank installation to septic tank inspection. When you need a reliable and trustworthy septic pump service, Alvarado Pumping Septic Service is there to help. With emergency services available, we take away the stress that comes with costly repairs. We do it right the first time, every time. Septic tank maintenance will avoid the high cost of a repair later on; we offer a complete pumping service that will keep everything moving the way that it should, with tight and waterproof sealing. Contact us today to learn more about what we can do for you!